Freeform Image Crop: How to Crop an Image Into Any Shape
Sep 22, 2026 • 7 min read
Every crop tool you have ever used cuts a rectangle. But what if the thing you want to keep isn’t rectangular — a person, a product, a logo, a sticker shape? That’s where freeform cropping comes in: instead of dragging a box, you draw the exact shape you want with editable points, and everything outside it is removed.
TL;DR
- Freeform crop = draw any polygon shape, not just a rectangle.
- The boundary is a true vector path of draggable points — refine it as much as you like.
- Export as PNG or WebP to keep the background transparent.
- Our free freeform image crop tool does it all in your browser — no upload, no signup.
What Is Freeform Cropping?
A normal crop stores four numbers: x, y, width, height. A freeform crop stores a list of points — a polygon path like [(120, 40), (200, 90), (180, 210), …] — and the final image is generated by masking the photo with that exact path on a canvas. Because the shape is a real path rather than a box, the result can be any silhouette: circles, stars, product outlines, people cutouts.
Professional editors (Photoshop’s pen tool, Figma’s vector networks) have worked this way for decades. Freeform crop tools bring the same idea to a quick browser workflow: click to place points, drag them to refine, done.
Freeform vs. Box Crop: When to Use Each
| Situation | Box crop | Freeform crop |
|---|---|---|
| Framing a photo to 16:9 or 1:1 | ✅ Perfect | Overkill |
| Cutting out a person or product | ❌ Leaves background | ✅ Exact silhouette |
| Making stickers / thumbnails / memes | ❌ Boxy look | ✅ Clean cutout |
| Removing sensitive content precisely | Coarse | ✅ Trace the exact region |
| Speed | ✅ Seconds | A minute or two |
Rule of thumb: if the frame matters (aspect ratios, composition), use a box crop. If the subject matters (cutouts, stickers, overlays), use freeform.
How to Freeform Crop an Image (Step by Step)
Using our free online freeform crop tool — no software to install, no account needed:
- 1
Upload your image
Drag & drop or click to choose a JPG, PNG, WebP, or GIF. Or hit "Try with a sample image" to experiment instantly.
- 2
Click to place points
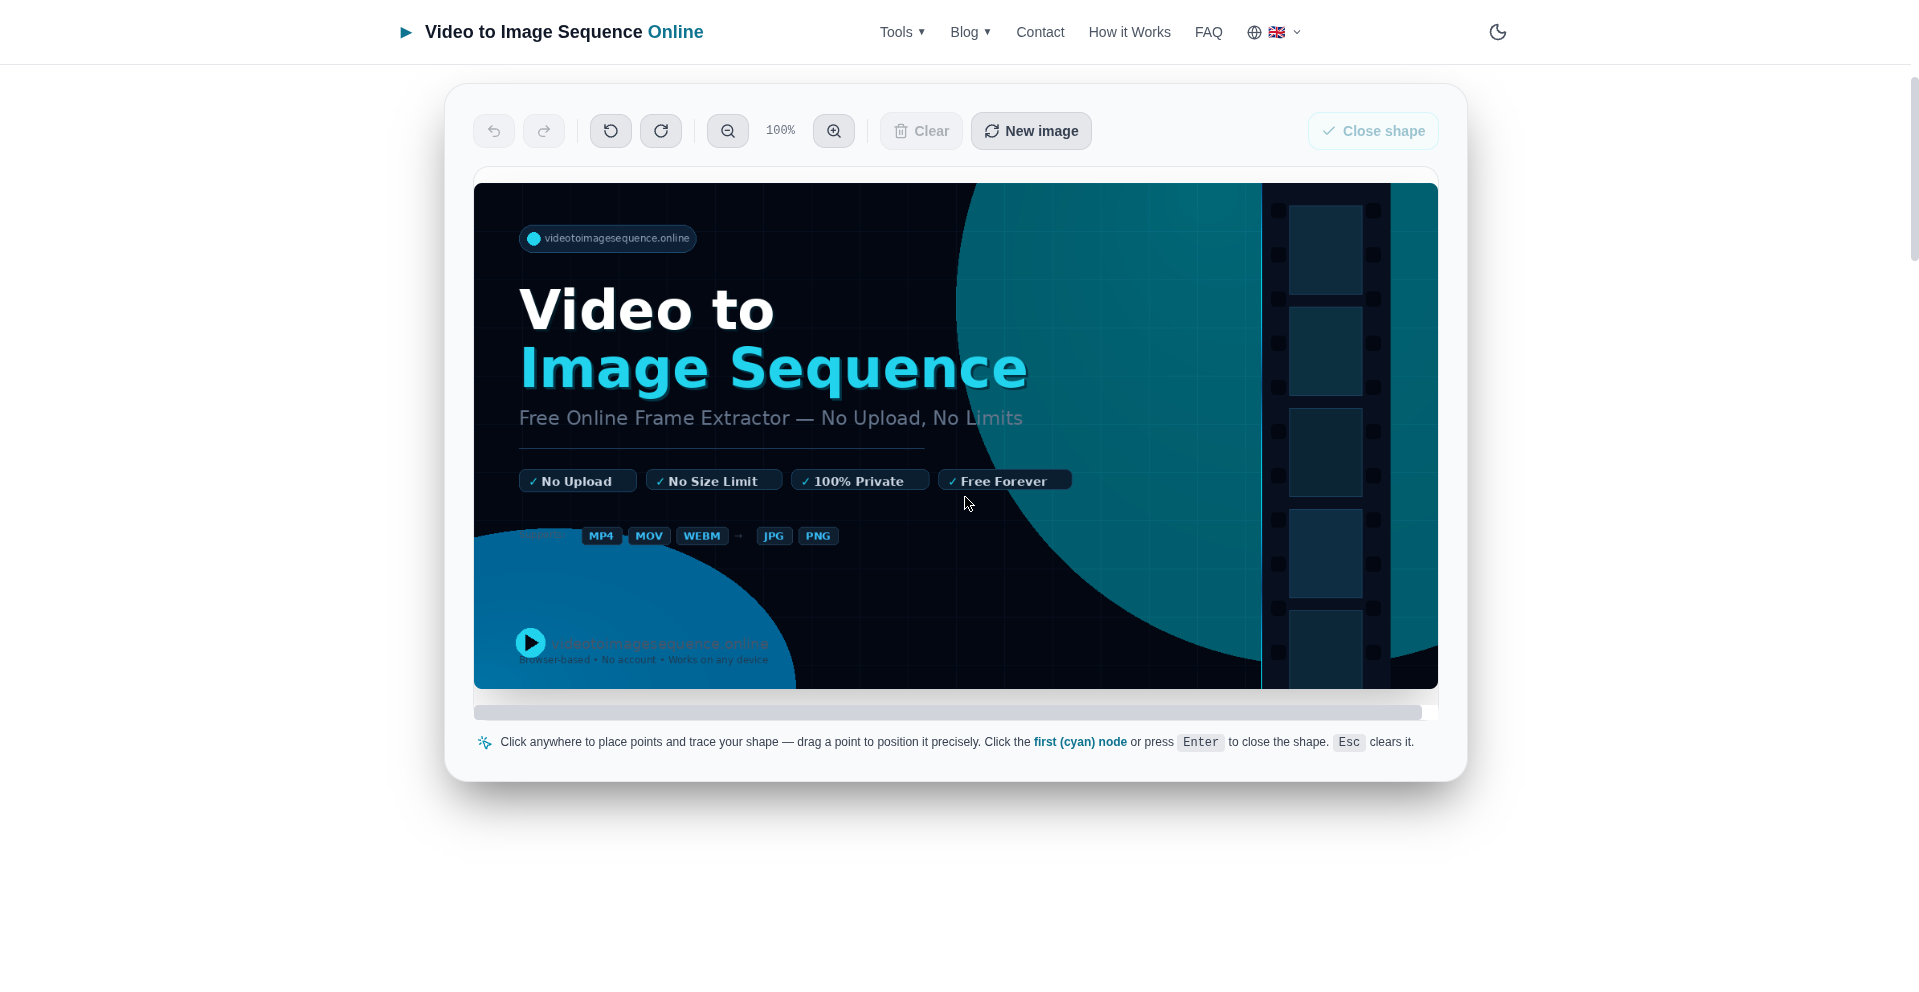
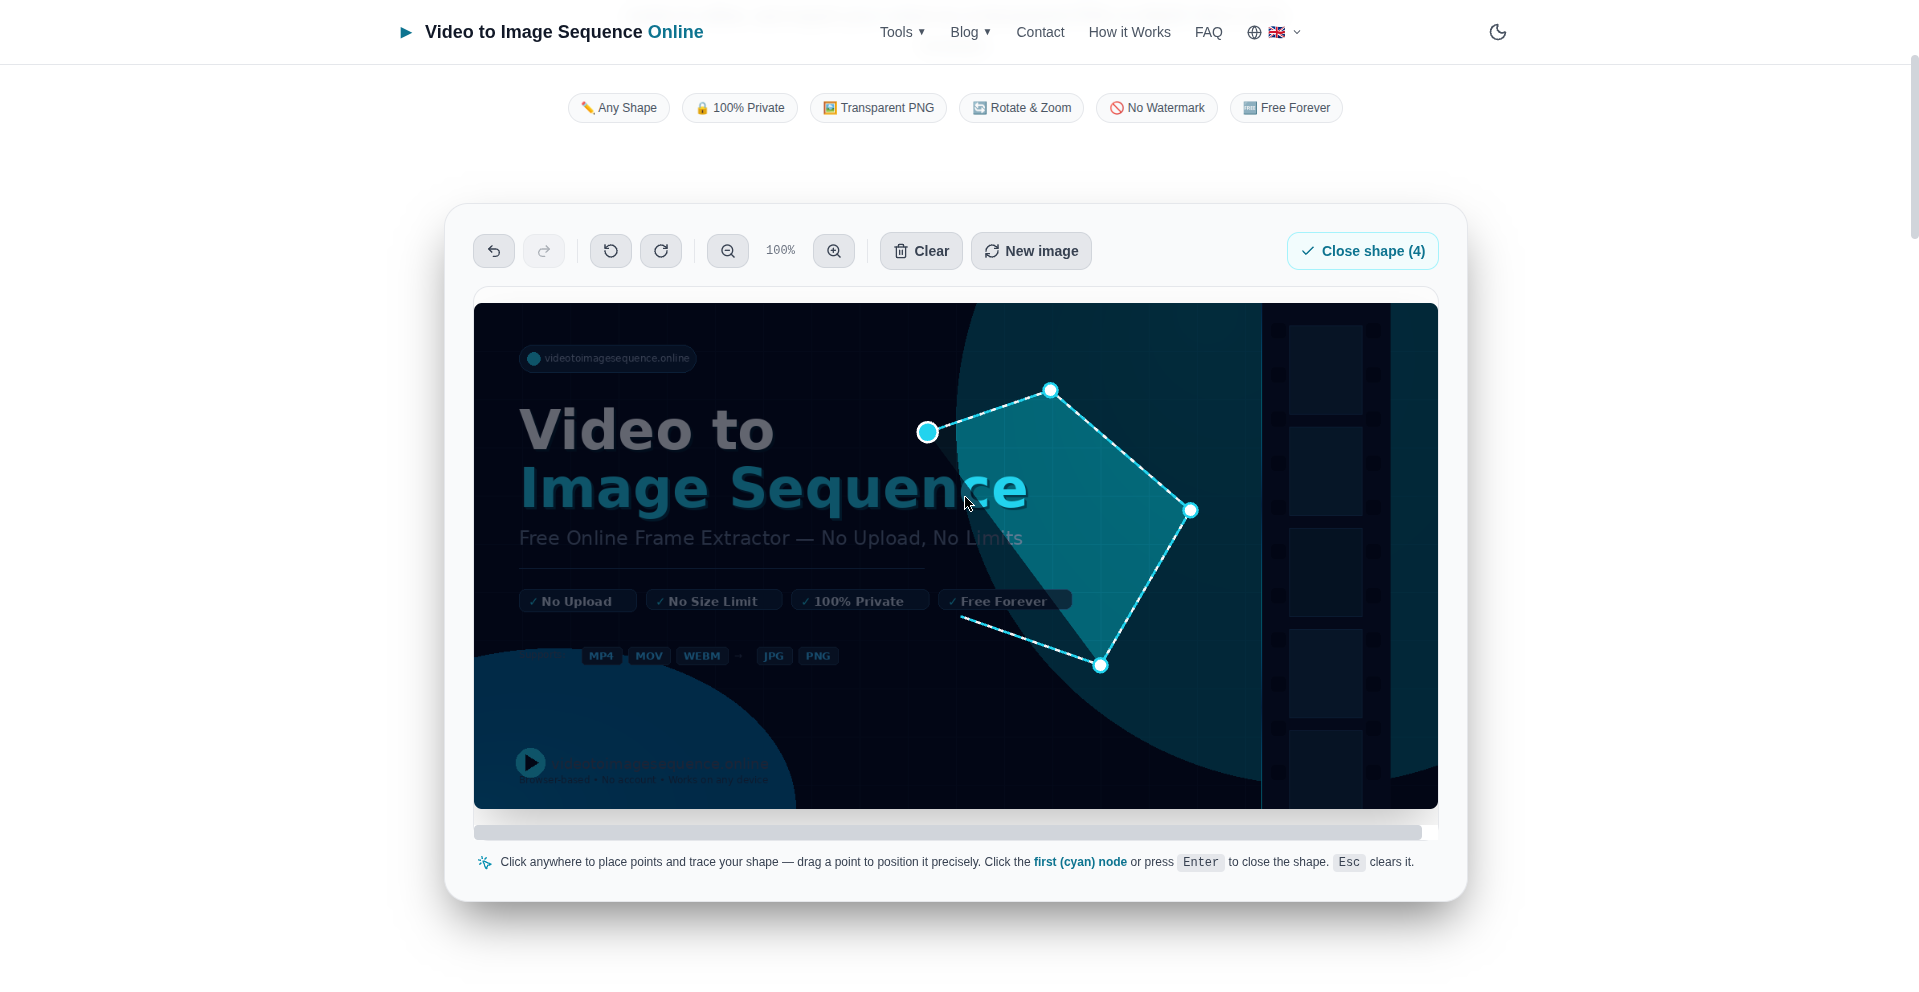
Click anywhere on the image to drop points around the area you want to keep. You can also press and drag to position each point precisely as you place it.
- 3
Close the shape
Click the first (cyan) node, press Enter, or hit "Close shape". You need at least 3 points.
- 4
Refine the boundary
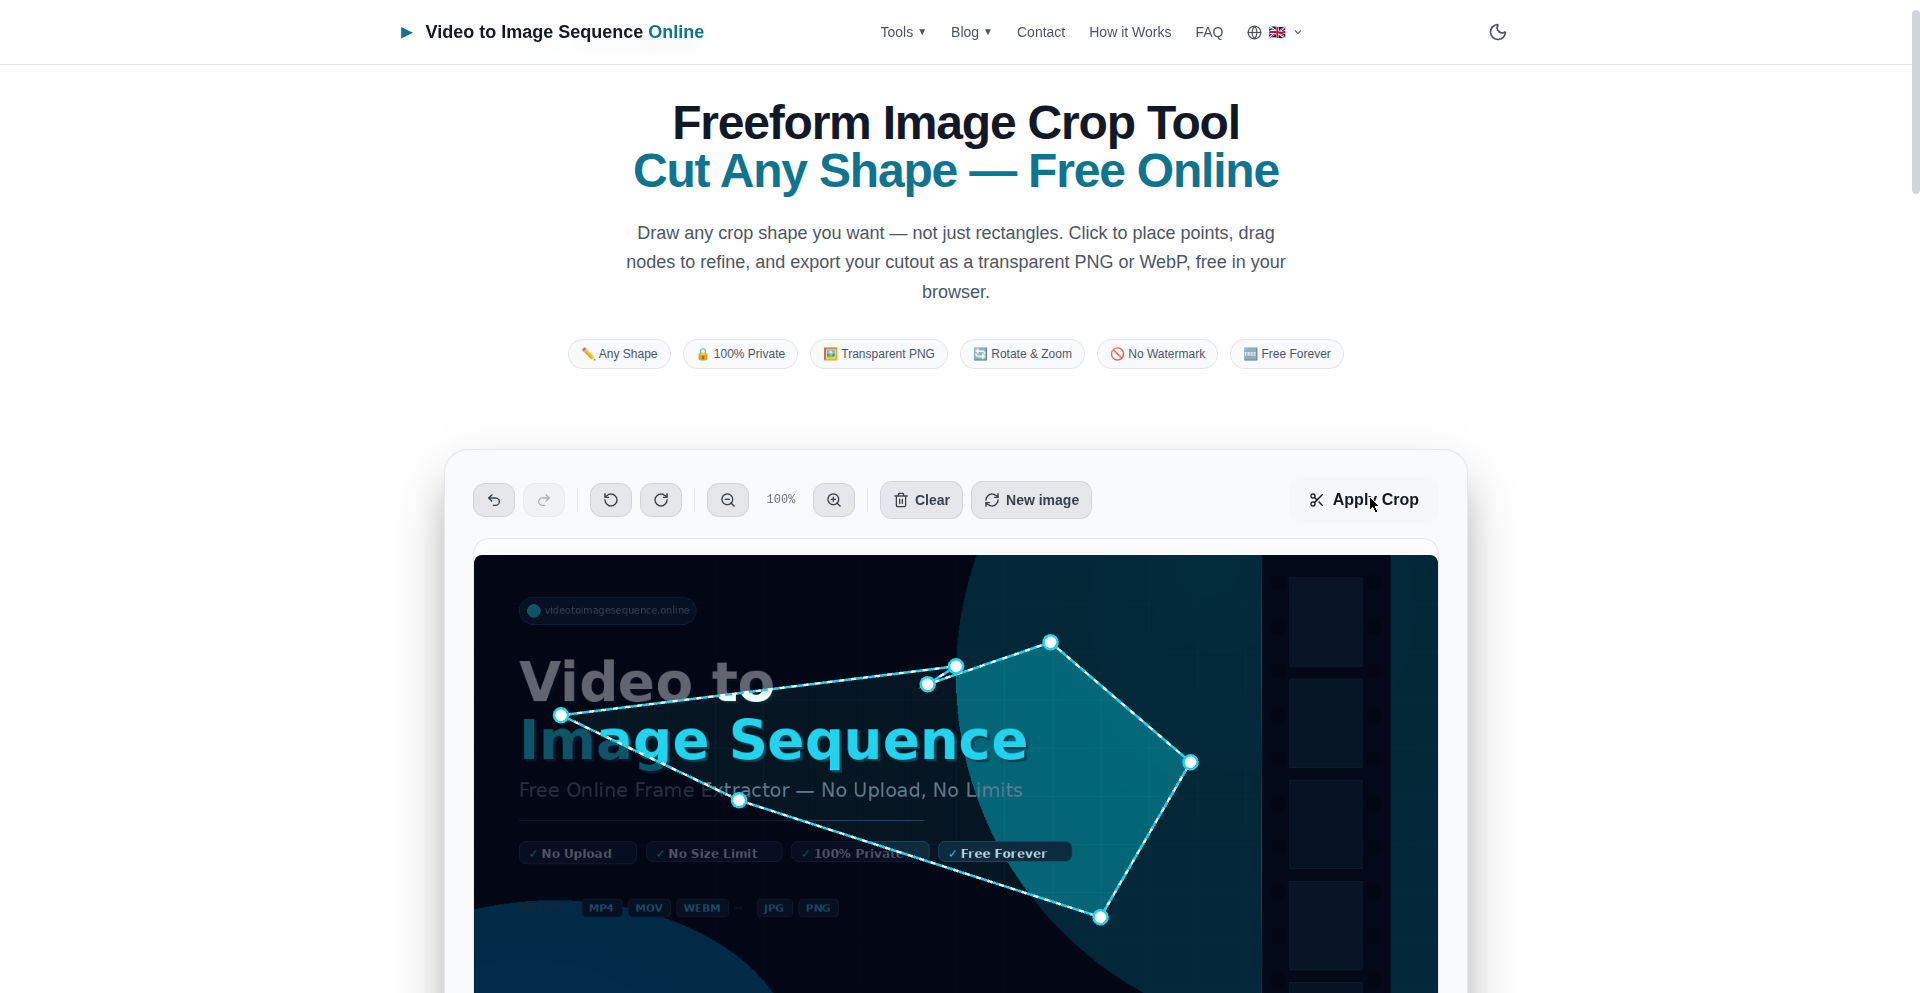
Drag any node to reshape it. Drag an edge to insert a new point exactly where you need one. Double-click a node to delete it. Drag inside the shape to move the whole selection. Zoom in for pixel-level precision.
- 5
Rotate if needed
Straighten the image first with the 90° rotate buttons — your polygon rotates along with it and stays aligned.
- 6
Apply and download
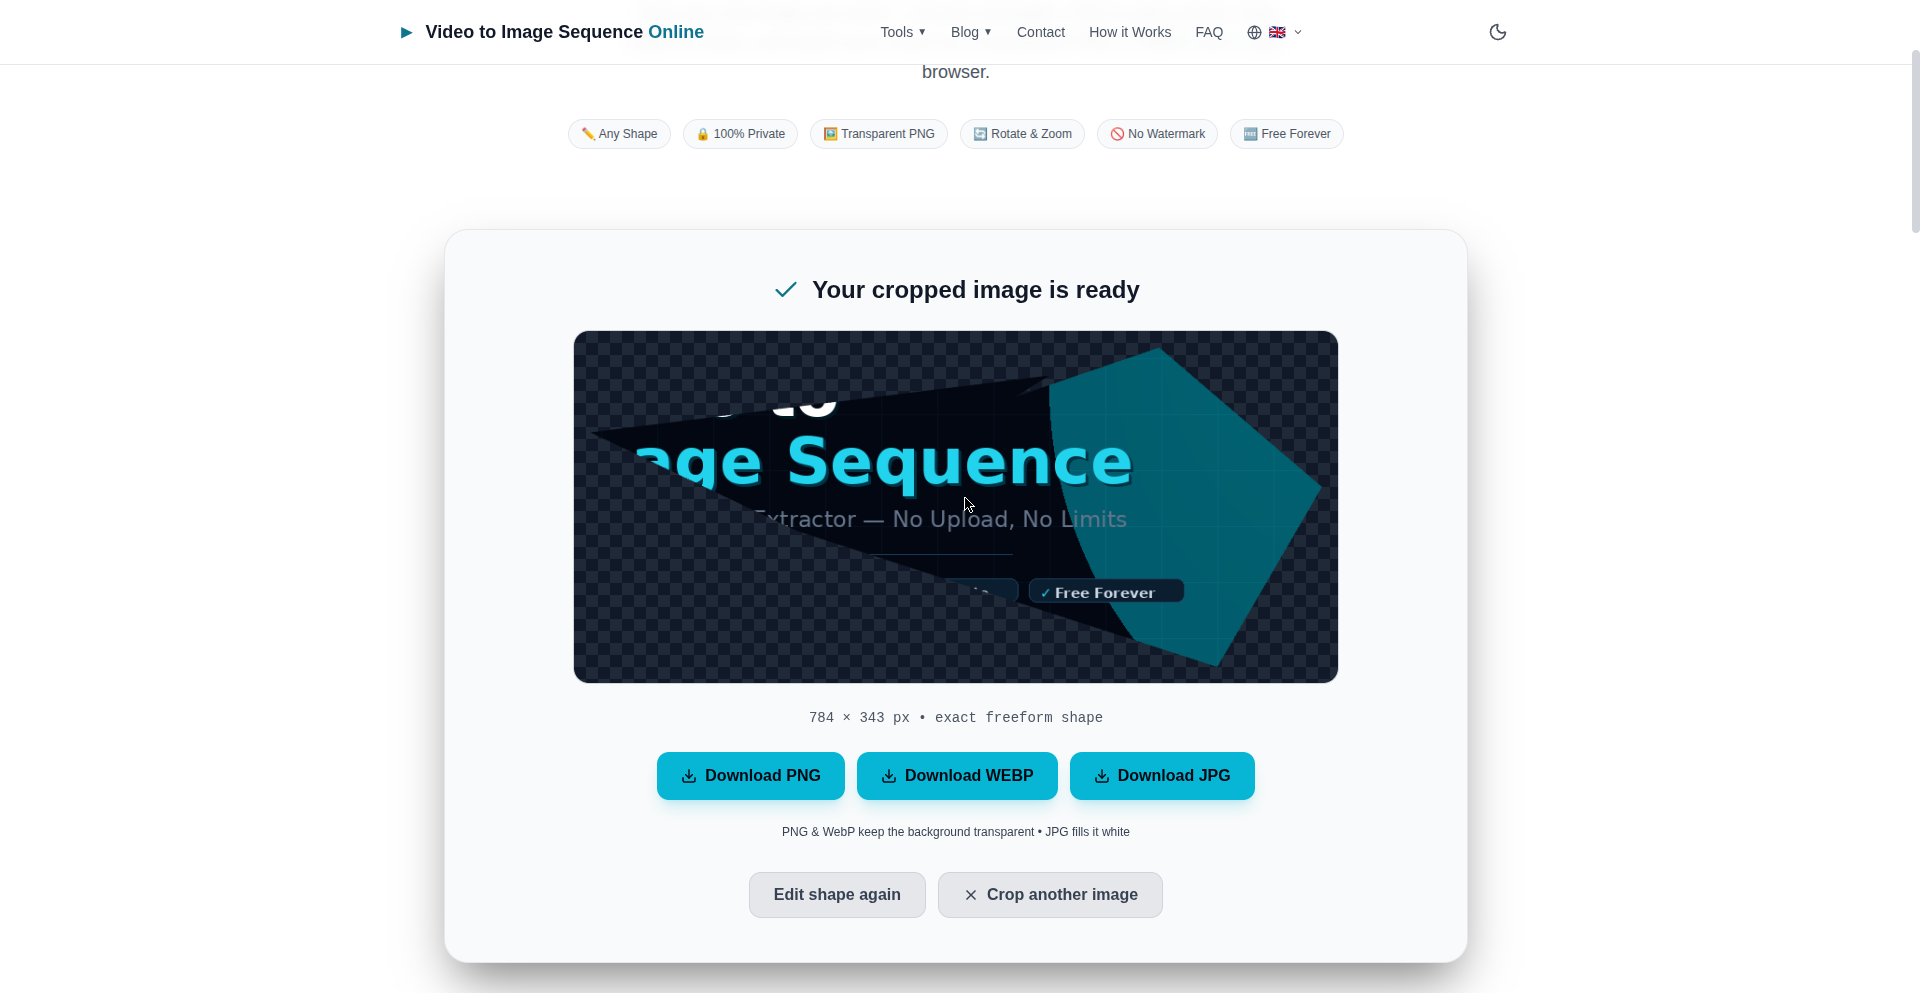
Click "Apply Crop", then download as PNG (transparent), WebP (transparent, smaller), or JPG (white background).
Step-by-Step Tutorial: See It in Action
A visual walkthrough of a real freeform crop on our free image crop tool, using the built-in sample image:
Pro Tips for Clean Cutouts
Zoom before fine detail
Zoom to 200–300% around tricky edges (hair, product corners). Small drags move nodes by single pixels.
More points = smoother curves
Approximate curves with many closely-spaced points instead of a few long straight segments.
Add points on edges, not just corners
Drag the middle of any edge to insert a node exactly where the boundary bends.
Undo is your friend
Every action — point, drag, rotate, delete — has full undo/redo. Experiment freely.
Keep the original resolution
The tool renders at your image’s native resolution. Don’t downscale before cropping if quality matters.
Pick PNG for design, WebP for web
Both keep transparency. PNG is lossless and universal; WebP is ~30% smaller. See our full format guide below.
Transparent PNG vs. JPG: Which Export?
Freeform crops shine with transparency: the area outside your shape becomes see-through, so the cutout drops cleanly onto any background. That requires PNG or WebP. JPG cannot store transparency, so the tool fills the outside area white instead — fine for documents and printing, wrong for overlays.
For the full breakdown — file sizes, quality, and which format tools like Blender and Photoshop prefer — read our JPG vs PNG vs WebP comparison.
Common Questions
Is the freeform crop tool really free?
Yes. No signup, no watermark, no usage limits — the same as all our tools. Everything runs in your browser, so there’s no server cost to pass on to you.
Can I crop a circle or other exact shapes?
Yes — approximate any shape with points. For a near-perfect circle, place 12–16 evenly spaced points around it; for stars and polygons, click each corner. Dragging nodes afterward fine-tunes the result.
Does freeform cropping reduce image quality?
No. The crop is rendered at your image’s original resolution and clipped with a vector path. Quality only changes if you choose a lossy export (JPG/WebP) — PNG is pixel-perfect.
Is my photo uploaded anywhere?
Never. The entire tool — upload, point editing, rotation, export — runs locally in your browser. Your images stay on your device.
Can I use the cutout in Photoshop, Canva, or Blender?
Absolutely — export as PNG and you get a standard transparent-background image that opens everywhere, including Photoshop, Canva, Figma, and Blender.
Try the Freeform Crop Tool Free →